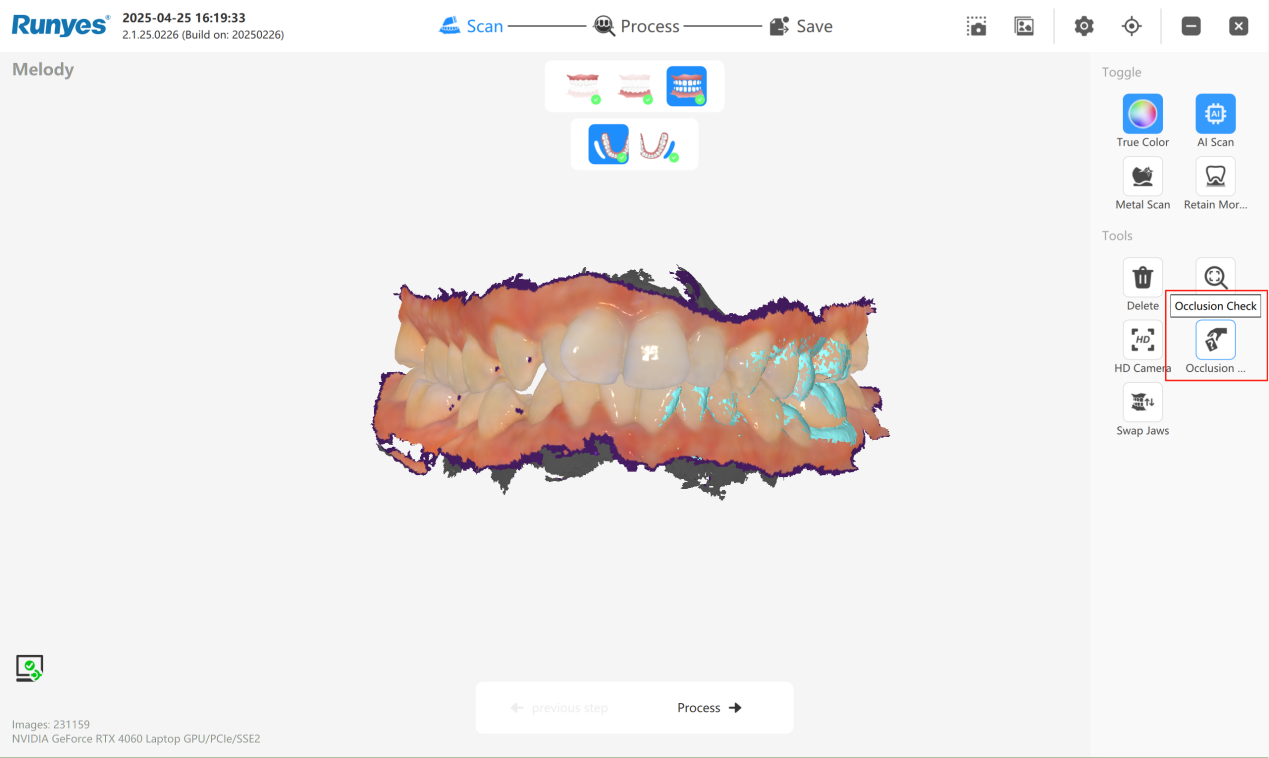
Occlusion Check
Under normal circumstances, we recommend shooting a set of bite relationships on the left and right sides respectively. The results of the software's "optimization check" satisfy most scenarios. After the "Optimization Check" is completed, if you find that the occlusion relationship is not as expected, you can return to the scanning page and enter the "Occlusion Check" module on the occlusion shooting page:
The occlusion check function provides four alternative occlusion relationships, namely "Bite 1", "Bite 2", "Optimized Bite" and "Auto Bite". The system defaults to "Optimized Bite":
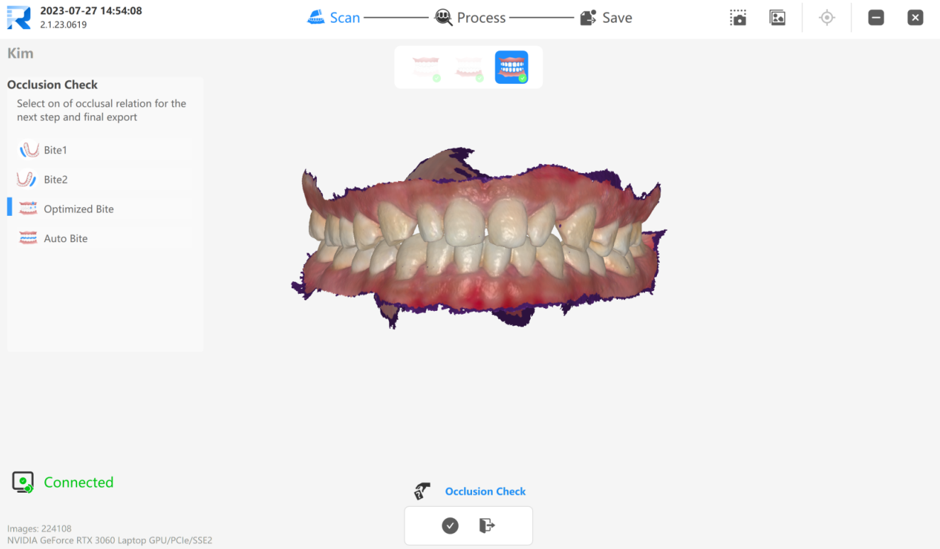
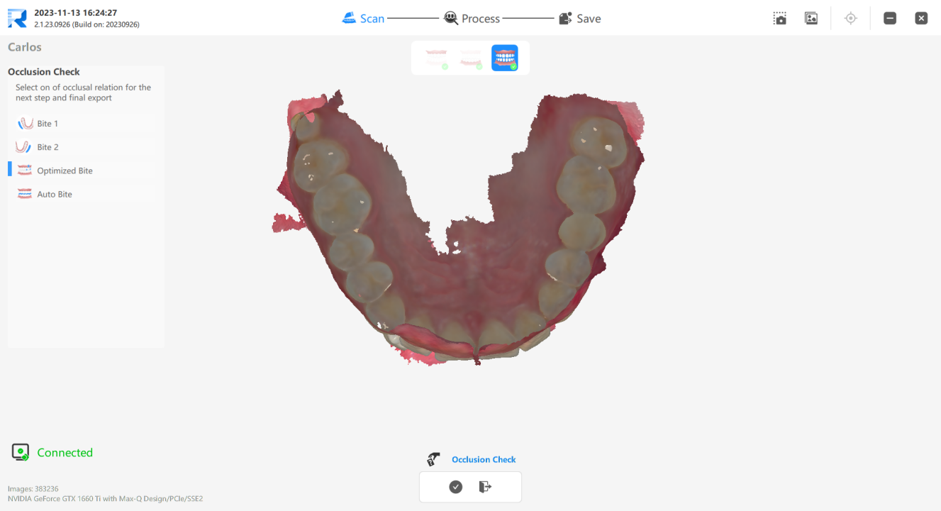
Select one of the four alternatives, such as "bite 1", click "OK" and enter "Optimization Check".
Note: The reselected occlusion will be consistent with the re-optimized results and will not really take effect until the "Optimization Check" ends.

If none of the four alternatives meet your needs, you can return to the scan page and shoot again.
Overview of the 4 Bite Modes
- Bite 1
Uses only the left-side occlusion data to generate the result.- Equivalent to scanning and using only the left bite.
- Useful when the right-side data is incomplete or unreliable.
- Bite 2
Uses only the right-side occlusion data to generate the result.- Equivalent to scanning and using only the right bite.
- Suitable when the left-side data is insufficient.
- Optimized Bite (Default Option)
Combines data from both left and right sides to generate an optimized occlusion result.- Balances the bite using all available occlusal information.
- Recommended for most clinical cases.
- Auto Bite
Based on the Optimized Bite, this mode adjusts the occlusion to achieve a tighter contact when an open bite is detected.- Mostly used in open-bite scenarios.
- Adjustment direction (tightening or loosening) is adaptive and depends on occlusal gap and contact area.
Occlusion Measurement
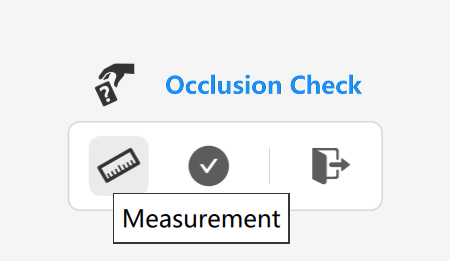
Click on the "Occlusion Check" tool in the right toolbar to enter the measurement and inspection page.
Click the "Measurement" tool in the lower-left corner, and a purple section for measurement and inspection will appear on the screen.
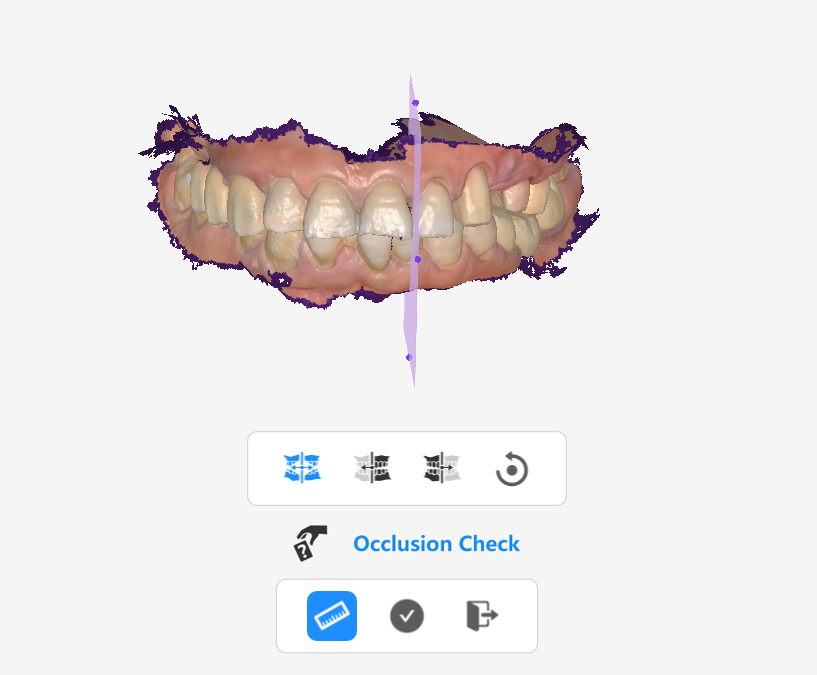
Move the mouse over the section, and it will change from purple to yellow, indicating the section is selected. At this point, you can move the section up, down, left, or right. Each of the four edges of the section has a purple dot, which will turn yellow when selected. This dot allows you to rotate the section.
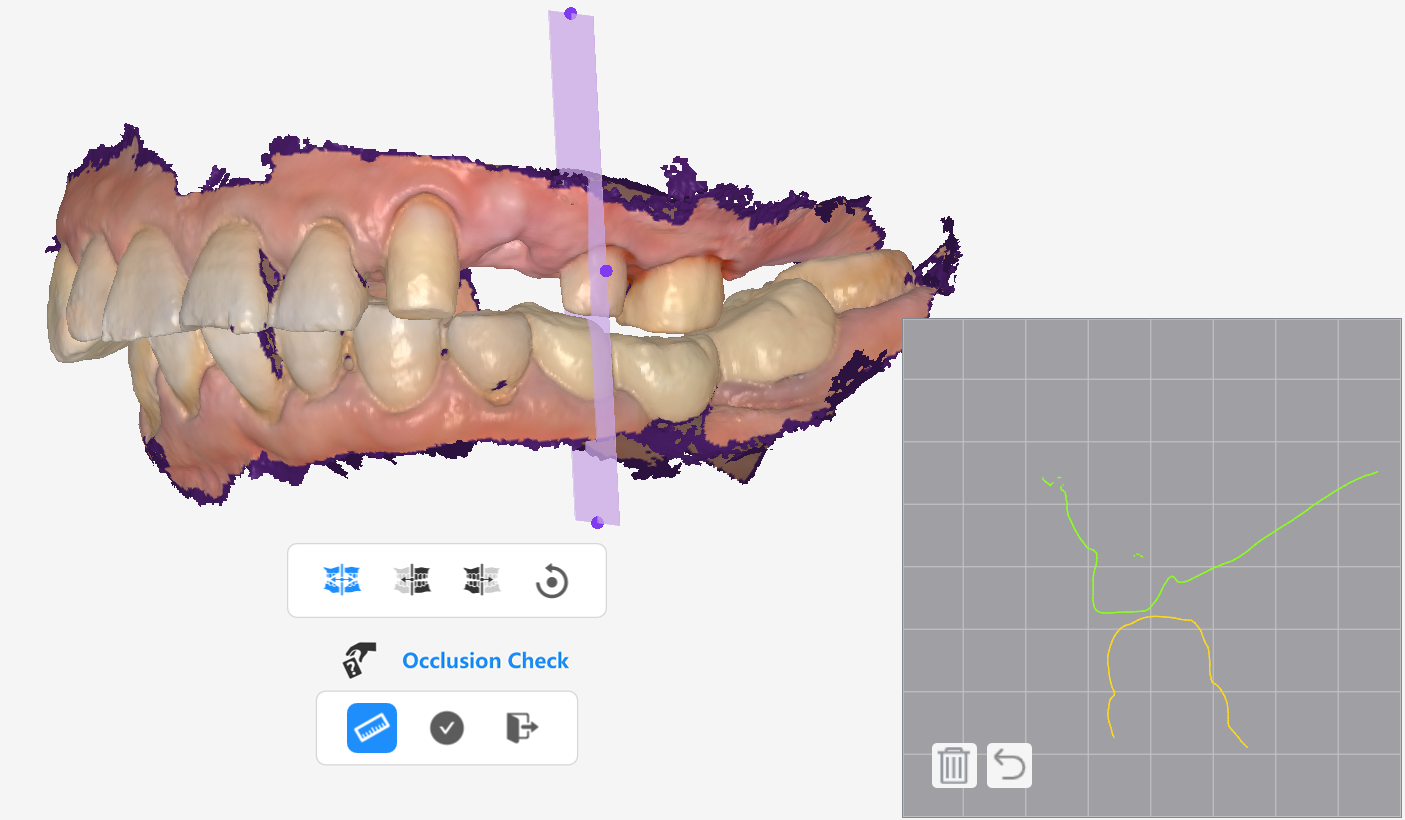
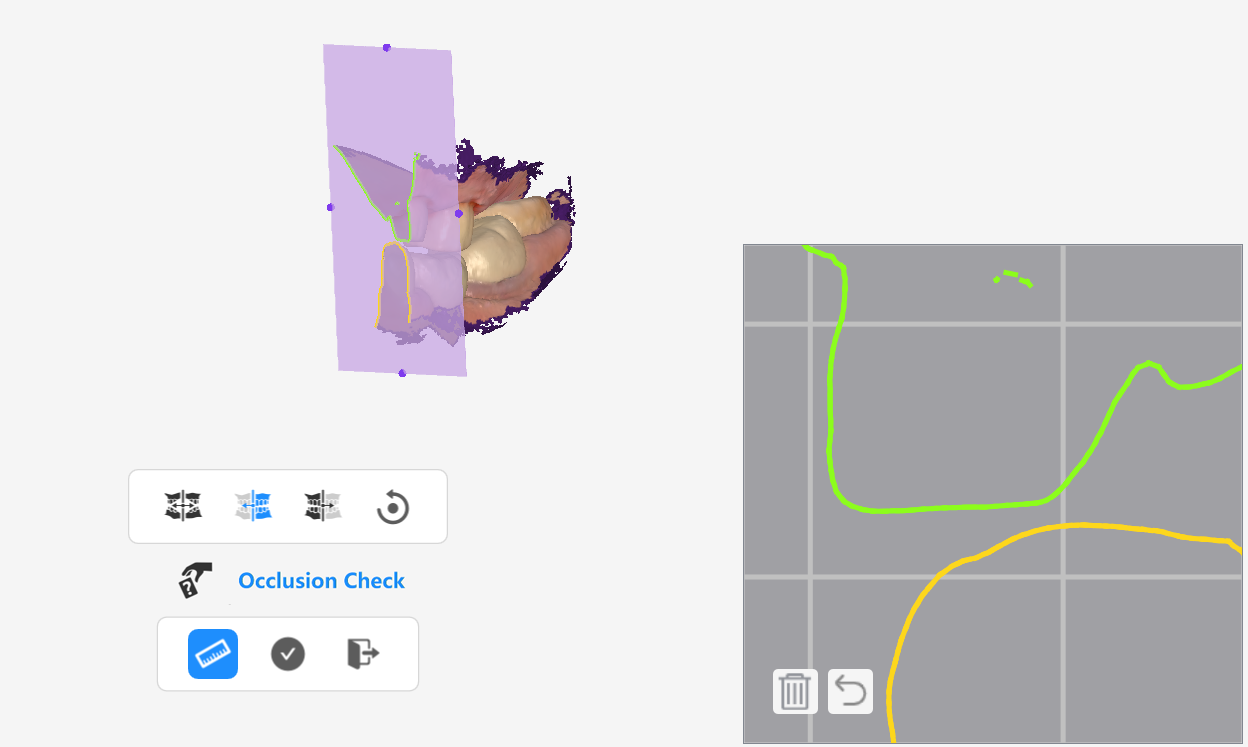
Move and rotate the section to the measurement position (such as the preparation area). The lower-right canvas will display a cross-section of the current section and the 3D image. The intersection line between the section and the upper jaw teeth will be displayed in cyan, while the intersection line with the lower jaw teeth will be displayed in yellow.
 Show only the 3D image on the right side of the section.
![]() Show only the 3D image on the left side of the section.
Show only the 3D image on the left side of the section.
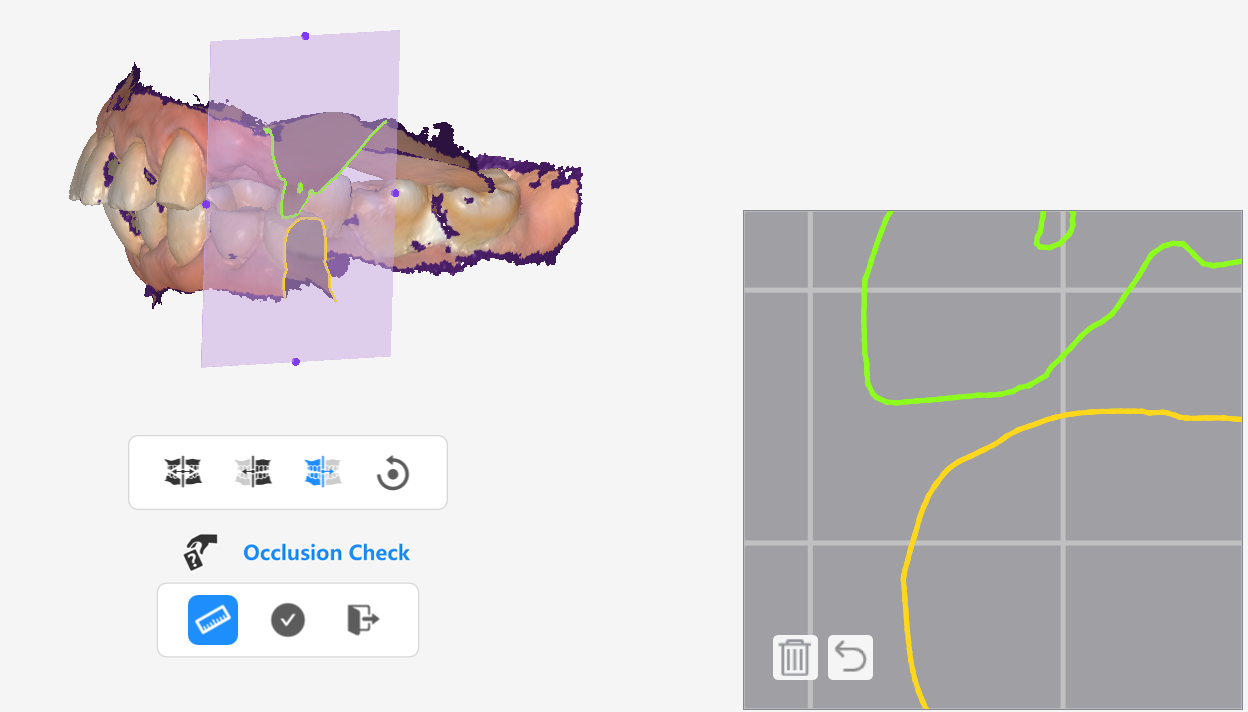 5. Move the mouse to the lower-right canvas area. You can use the mouse scroll wheel to zoom in and out of the canvas and intersection lines, while the left mouse button can be used to pan the canvas.
6. On the cyan and yellow intersection lines on the canvas, select two points, and the distance between them will be automatically measured.
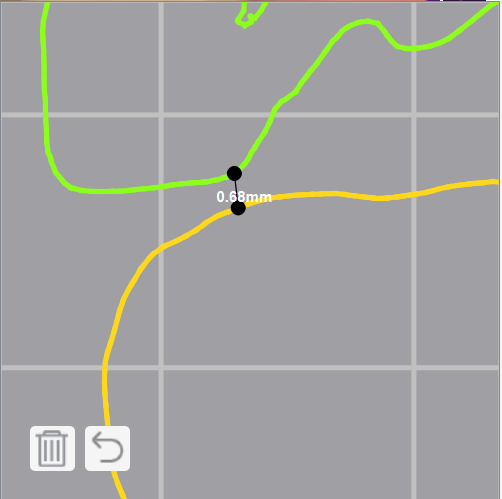
7. Multiple measurements can be taken. Use![]() to undo the most recent measurement result, and
to undo the most recent measurement result, and ![]() to delete all measurement results.
to delete all measurement results.